Git is a version control system often used by teams to manage project files. Github is a website built around Git on which hundreds of thousands of users manage projects and project files. Incorporating Git and Github into your workflow can save lots of time, can help you show the individuals responsible for different features of your projects, and can give you one of the fundamental skills required for a variety of technical enterprises.
To get started with Git, let's register for an account at Github.com's homepage:

If you don't have an account, type out a username and password. A popular convention for usernames is your first initial followed by your last name (e.g. if your name was Susy Peppers, your username would be speppers). If that name is taken, some people insert their middle initial between the first and last name components of the username, while others use a different name altogether.
After you sign in, you can click on your image in the upper right hand corner of the navigation bar to reach your user's home page:

From there, click the "Repositories" tab in the navigation bar (it's to the right of "Overview"). Doing so will take you to a list of all your repositories:

Click the big green button that says "New" in the upper right hand corner to create a new repository. This will bring up the following screen:

Click the button that says "Initialize this repository with a README", as doing so will make it easy to start adding files to your project quickly. After you've checked that box, click "Create repository". Congratulations, you just created your first Github repository!
To add files to a project, you can simply drag them from a folder on your machine onto the repository page. If you do so, you'll see a screen that allows you to type a commit message. A commit message is just a note to yourself and other team members that indicates what you changed in as few words as possible. These commit messages become important markers of changes made to a project, so craft a short message with care!
After typing out a commit message, you can toggle between two radio buttons to either:
- Commit directly to the master branch
- Create a new branch for your commit and start a pull request
For now, let's click the first button, "Commit directly to the master branch":

Then let's click the button that says "Commit changes". If you click that button, Github will make the changes you requested to your repository.
If you click your repository name at the top of the page, you should be taken to your repository's home page. There you should find that your changes have been made to the project. Congratulations, you just added your first commit to an extant reposotory!
While the method we just used will allow you to add files to a project, team members usually use a different approach to making changes to a project. Instead of commiting directly to the master branch of a project--which forces team members to accept your changes--team members usually create a branch that includes all of the changes they want to make, then submit a pull request that humbly asks team members to merge the changes made in the branch to the project.
There are two kinds of branches we need to think about: the master branch, and feature branches.
The master branch is the stable, organized, and polished collection of your project files. A feature branch, by contrast, is a small collection of changes that introduce some functionality, or a set of resources, to your project. The following diagram gives a visual representation of the ways in which a feature branch is added to a project:

As we see here, adding a feature branch to the master branch requires these steps:
- Create a feature branch
- Commit some changes to that feature branch
- Transform the branch into a pull request
- Discuss the proposed changes/pull request with team members
- Merge the changes if they're deemed acceptable
We'll walk through these steps below.
If you click on your repository's name at the top of your page, you will be taken to your project's home page on Github. From here, try dragging a new file to your project. After you do so, you'll be given the opportunity to add a short commit message that documents your changes (just as we saw above).
After typing out a short message, you can toggle between two radio buttons to either:
- Commit directly to the master branch
- Create a new branch for your commit and start a pull request
Earlier we committed directly to the master branch, and saw our changes instantaneously. As we discussed however, this is often suboptimal, as it forces team members to accept your changes. It's usually better to click the "Create a new branch" button, as this will allow team members to discuss your proposed changes before those changes are added to the project. When in doubt, always use this latter option over directly committing to the master branch.
After you click the "Create a new branch" button, you can name your branch in the input field that appears. Your branch name should give some indication of what you changed, and you should connect different words in that name with hyphens (e.g. add-new-images). This concatenation of words via hyphens is known as kebab-case.

Once you've named your branch, click the big green button that says "Propose changes". Doing so will bring up a screen on which you can transform the branch you just created into a pull request.
After you've created a branch, you can transform that branch into a pull request. A pull request is simply a request to make some changes to the files included in a repository. These changes can include the addition of new files, the deletion of extant files, and/or the modification of extant files. Each pull request should address one area of functionality related to a project.
To transform the branch you just created into a pull request, click the big green button that says "Create pull request":

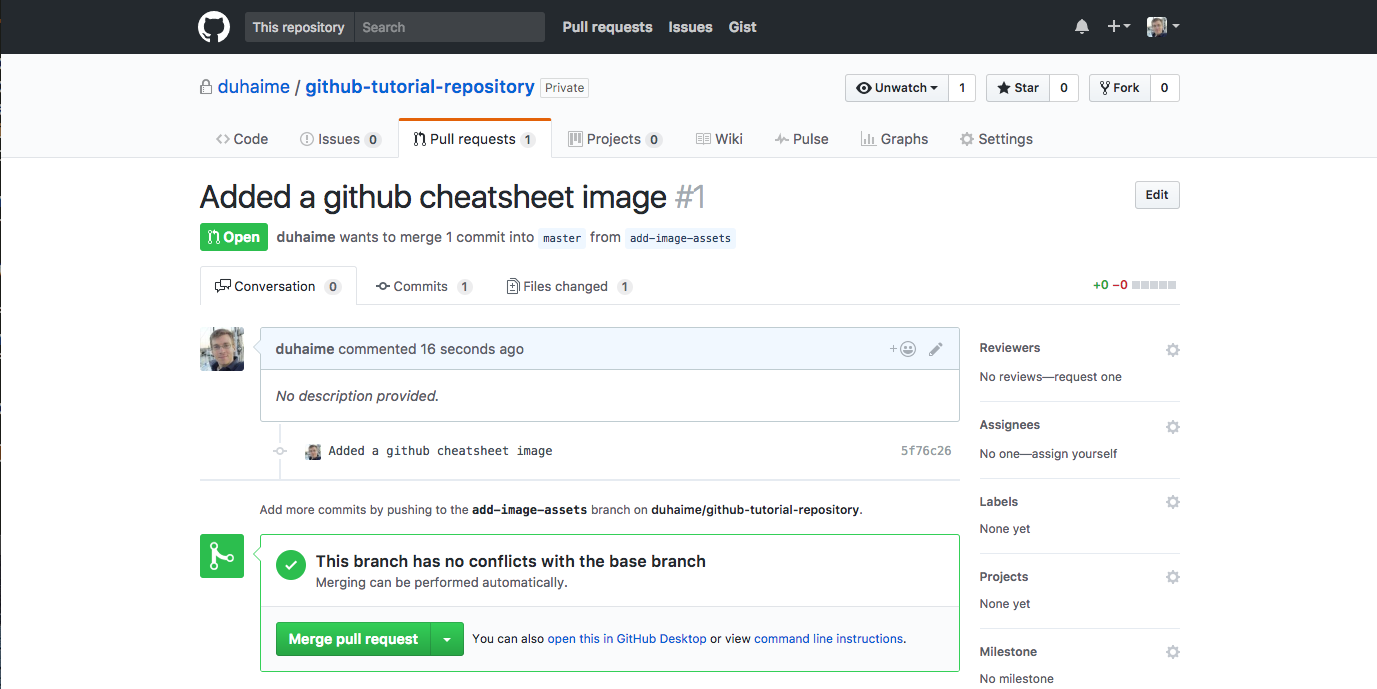
Once you've created a pull request, that pull request will appear under the "Pull Requests" tab at the top of the repository. If you click on the given pull request, you will see all of the information related to this pull request. That information includes:
- a list of files changed
- a headshot next to each commit that indicates who made the change to the project
- commit messages that document the ways each commit changed project files
- a
diff(or indication of what changed in the given file) to the right of each commit message
Usually team members will write messages back and forth at this point, suggesting that certain changes be made to files before the pull request is merged into the project. For example, if a team member submitted a pull request that introduced a new function to an R script, and that function could be optimized in some way, teammates might request that the author optimize the function before the pull request is merged into the project.
Once you're satisfied with all changes proposed in the pull request, you can click the "Merge pull request" to merge the changes outlined in this pull request into the project. You'll be asked to confirm your decision by clicking a subsequent "Confirm merge" button.
After merging the changes, if you click on your repository name at the top of the page, you'll be taken to your repository's overview page, where you should see the file(s) you added in your branch and your commit messages for each commit in the branch. Congratulations, you've just created and merged your first pull request!
To allow other teammates to contribute to your project easily, you can add them as team members on the repository. To do so, click the "Settings" button all the way to the right in your project's navigation bar. Clicking that tab will display a page that looks like this:

If you click the "Collaborators" button in the list of buttons to the left, you'll see a new screen that looks like this:

On this page, you can type the Github username of an individual you want to add to your repository, then click "Add Collaborator" to add them to your project. They'll soon get an email asking them to accept your invitation. If they do, they'll be able to submit new pull requests just like we did above to contribute to the project.
The steps we outlined above will allow you to go pretty far with version controlled projects on Github. As it turns out, however, there's a much faster and much more flexible way to engage with git: the command line!
To get started with Git from the command line, we'll turn to the excellent tutorial offered for free on Codecademy's website. If you're not familiar with Codecademy, they have an awesome collection of free programming classes that cover the basics of many programming languages and tools, including everything from front-end web development (HTML, CSS/SASS, and jQuery/Angular/React/Javascript), to databases (SQL), to server-side programming (Node.js, Ruby on Rails, PHP, Python...).
Let's go ahead and follow this link to get started with Git from the command line.

After finishing the Codecademy git tutorial, you might want a cheatsheet that gives you an overview of all of the commands built into Git. RebelLabs has put together the following awesome overview:

Fournova, another agency, has put together their own variant on the Git cheatsheet:

If you have questions about any of the material we covered here, feel free to create an issue in this repository and we will be happy to help out. Alternatively, feel free to create a question on StackOverflow, where there are 800,000 users eager to help answer programming questions. Happy coding!