
Erin’s Recipe Rundown

Texture: Crisp edges and soft, chewy centers.
Taste: Nutty brown butter, warm spices, and classic oat with a hint of molasses.
Ease: The hardest part is browning the butter, but it’s well worth the effort. Other than that is is an easy, classic cookie recipe!
Top Tips: Pulse the oats just to the point that you have a variety of textures. You want both chopped oats and oat flour.
Recommended GF Flour: I like to use King Arthur Flour Gluten-Free Measure-for-Measure Flour for this recipe. It’s a high-quality gluten-free blend that contains xanthan gum.
Would I make these again? Yes! These are one of my all-time favorite cookies. The chewy brown butter cookies with oats and sweet glaze is just next level delicious!
xoxo erin

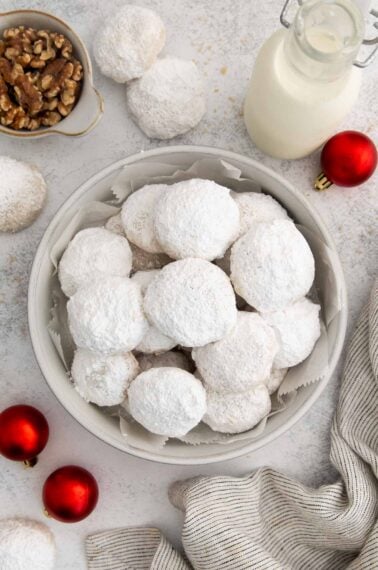
I set out to create a gluten-free version of the timeless iced oatmeal cookies we all know and love. These gluten-free iced oatmeal cookies I dare say are even BETTER than the original!
These cookies have the nutty flavor of brown butter with perfect golden edges, soft centers, and a crisp topping of vanilla icing!
Whether for dessert at home, a holiday treat platter, or to share at cookie exchanges, this recipe is a confirmed crowd-pleaser!
Table of Contents
- Erin’s Recipe Rundown
- Ingredients You’ll Need
- Gluten-Free Oats
- How to Make Gluten-Free Iced Oatmeal Cookies
- Make-Ahead/Storage/Freezing Instructions
- Can these gluten-free iced oatmeal cookies be made dairy-free?
- Can I skip the icing on these cookies?
- Can I use quick oats instead of rolled oats?
- More Gluten-Free Christmas Cookies
- Gluten-Free Iced Oatmeal Cookies Recipe
Ingredients You’ll Need
Here are a few notes on some of the key ingredients to make these gluten-free iced oatmeal cookies. See the recipe card below for exact measurements.

- Gluten-free flour: I recommend using a high-quality gluten-free measure-for-measure flour that contains xanthan gum as a binder to ensure the right texture. This is my favorite brand.
- Spices: Cinnamon and nutmeg add warmth and extra flavor to the cookies. They complement the oats for that classic oatmeal cookie taste!
- Gluten-free rolled oats: Be sure to use certified gluten-free oats! I recommend rolled oats for these cookies, rather than quick oats, to get the best texture.
- Brown/granulated sugar: Both sugars add sweetness. The brown sugar adds moisture and helps achieve the chewy centers. The granulated sugar helps create the crisp edges for the perfect blend of textures.
- Butter: Browning the butter is important for the overall taste and texture. It’s a key step in many of my cookie recipes! For dairy-free, you can use vegan butter, but keep in mind most vegan butters won’t brown.
- Molasses: The molasses adds depth of flavor to the overall sweetness and adds rich flavor that pairs well with the warm spices.

- Powdered sugar: The classic cookie uses a powdered sugar glaze that firms up for that smooth, yet crisp layer of icing.
- Milk/vanilla: These two ingredients add the needed liquid for the powdered sugar icing. The goal is to make this icing very, very thick so it covers the cookies evenly and sets. For dairy-free, use a dairy-free milk of your choice.
Gluten-Free Oats
- Oats are naturally gluten-free, but they’re often harvested, processed and handled alongside wheat. Look for oats that are specifically labeled gluten-free. For more information, check out this article that answers the question: Are oats gluten-free?
- I like to use a food processor to break the gluten-free rolled oats down a bit. Pulsing them 10-12 times will create a good mixture of chopped oats and oat flour. This is important for the overall texture and chew of the cookies!
- Here is what you’re looking for when you pulse the oats in the food processor:

How to Make Gluten-Free Iced Oatmeal Cookies
Here’s an overview of how to make this recipe. You can jump to the recipe for the full instructions!

- In a medium bowl: Whisk together the gluten-free flour, baking soda, cinnamon, nutmeg, and salt, then set the bowl aside.
- In a food processor: Pulse the rolled oats 10-12 times until you get a good mix of textures.

- In a medium skillet: Melt the butter over medium-low heat, stirring occasionally. Continue to cook the melted butter Once it starts to foam, stir constantly so the milk solids don’t stick to the skillet. You’ll see it change from yellow to golden brown and it will create a nutty aroma. Remove it from the heat and pour it into a medium bowl right away.
- Add sugar: Whisk both the brown sugar and granulated sugar into the brown butter.

- Add ingredients: Whisk in the eggs, vanilla, and molasses. You want it to become smooth and creamy. I then like to use a rubber spatula to mix the dry ingredients into the wet mixture until well-combined.
- Prepare the dough: Stir in the oats, then scoop the dough into balls (about 2 tablespoons). Place the dough balls onto a large plate or lined baking sheet, then cover tightly with plastic wrap and chill for at least 2 hours. You can chill the dough for up to 3 days, but you’ll want to move it to an airtight container if chilling longer than a few hours.

- On a lined baking sheet: Bake cookies at 350°F until the edges are golden brown and the centers are set (about 10-12 minutes). Cool on the baking sheet for 5 minutes, then move them to a wire rack to cool completely.
- In a medium bowl: Sift the powdered sugar, then add the vanilla and 1 tablespoon of milk. I typically just use a fork to mix it together. The icing should be very, very thick and hard to mix. If it’s too thin, add more powdered sugar. Lightly dip the tops of the cooled cookies into the icing, then let them sit at room temperature for a few hours to fully set.
Make-Ahead/Storage/Freezing Instructions
To Make-Ahead: This is a great make-ahead recipe! You can refrigerate the dough balls for up to 3 days (covered tightly). Or freeze the dough balls to prep further in advance!
To Store: Store cookies in an airtight container at room temperature for up to 5 days.
To Freeze (dough): Freeze the dough balls on a lined baking sheet for 1-2 hours until they’re set, then transfer to an airtight container or freezer bag. Freeze for up to 3 months. Bake them from frozen at 350°F. Add 1-2 minutes to the recipe’s baking time for frozen dough.
To Freeze (baked): Let them cool completely, then store in airtight container with parchment or wax paper separating the layers. Freeze for up to 3 months. Thaw at room temperature for 1-2 hours.

Can these gluten-free iced oatmeal cookies be made dairy-free?
Yes! Use vegan butter and dairy-free milk to make these cookies dairy-free. Keep in mind that most vegan butters won’t brown so you can skip that step when using vegan butter unless you’ve opted for a brand that can brown.
Can I skip the icing on these cookies?
Absolutely! The icing adds a bonus layer of sweet vanilla flavor and crispness, but it is totally optional. The oatmeal cookies are delicious on their own too!
Can I use quick oats instead of rolled oats?
Using quick oats will change the texture. I recommend the rolled oats to get that satisfyingly chewy texture. If needing gluten-free, always verify that you are using certified gluten-free oats! Check out this article answering are oats gluten-free?


Gluten-Free Iced Oatmeal Cookies
Ingredients
Dry Ingredients
- 2 cups (300g) gluten-free measure-for-measure flour
- 1½ teaspoons baking soda
- 1½ teaspoons ground cinnamon
- ¼ teaspoon ground nutmeg
- ½ teaspoon kosher salt
Other
- 1¾ cup (150g) gluten-free rolled oats
- 1 cup (227g) butter
- 1 cup (213g) brown sugar
- ¾ cup (150g) granulated sugar
- 2 large eggs room temperature
- 2 teaspoons vanilla extract
- 2 tablespoons molasses
Icing
- 1½ cups (180g) powdered sugar
- ¼ teaspoon vanilla extract
- 1½-2 tablespoons milk of choice

Instructions
- In a medium bowl, whisk together the gluten-free flour, baking soda, cinnamon, nutmeg and salt. Set aside.
- Pulse the oats in a food processor 10-12 times until you have a variety of texture—chopped oats with some oat flour. See photo above for a visual.
- Melt the butter in a medium skillet over medium-low heat, stirring occasionally.
- Once the butter is melted and begins to foam, stir continuously to prevent the milk solids from sticking to the skillet. The butter will change from yellow to golden brown quickly and will have a nutty aroma. Remove from the heat and immediately pour into a medium bowl.
- Add the brown sugar and granulated sugar to the brown butter. Whisk to combine.
- Whisk in the eggs, vanilla and molasses until smooth and creamy.
- Using a rubber spatula, mix in the dry ingredients until well-combined. Stir in the oat mixture.
- Scoop the cookie dough into round balls, about 2 tablespoons per ball. Place dough balls onto a large plate or lined baking sheet. Cover tightly with plastic wrap.
- Chill the dough balls for at least 2 hours or up to 3 days. (Transfer to an airtight container if storing more than a few hours.)
- Preheat the oven to 350°F. Line large baking sheets with parchment paper or silicone baking mats.
- Bake for 10-12 minutes or until the edges are golden brown and the center is set.
- Remove from the oven and cool on the baking sheet for 5 minutes. Transfer to a wire rack to cool completely.
- Sift the powdered sugar into a medium bowl. Add the vanilla extract and 1 tablespoon of milk and use a fork to mix together. The icing should be very, very thick and hard to mix together. If it’s too thin, add more powdered sugar.
- Lightly dip the tops of the cooled cookies into the icing. Let the icing sit at room temperature for a few hours to set.


SO GOOD!! perfect cookie for gatherings with non-gluten free people, everyone in my family was so surprised they were gluten free. i thought the dough was too thin to roll before chilling, so i chilled the dough and rolled after, and it still turned out very good. will definitely make again!!
This recipe is one of the best cookie recipes I have found , even being gluten free they are soft and have a great texture. Very good , will definitely be making these year after year .
Yay! We’re so glad you loved it, Lisa! Thank you for taking the time to share with us. Happy baking!
No shit this is the best cookie I have ever made, hands down 10/10 recommend! The brown butter with the molasses chefs kiss. I am full fatty on this one and did not make it gluten free and just used AP flour totes fine. I also did a 1.5x the recipe, worked great 🙂
We’re so glad you loved the cookies, Alexis! Thank you for sharing your positive experience with us. It’s good to know the all-purpose flour worked for you too. Happy baking!
Easy and REALLY delish!
We’re glad you enjoyed it, Karen! Thank you for sharing your positive feedback with us!
Very tasty, and great flavor. However I struggled also with them being way to thin and spread out. I followed all of the directions to a “T” and even kept the dough refrigerated and on separate cookie sheets while baking other batches. I ended up putting all the cold dough balls back in a mixing bowl and adding more flour. I honestly think they just need a bit more flour to have them rise up a bit more and not spread so thin. Next time, I would add an extra 1/4-1/3 cup of the KA Flour blend.
Hi Katie, thank you for your feedback! We’re glad you found a method that works for you and that you enjoyed the flavor. Happy baking!
These are absolutely incredible! My husband, who is not gluten free, said they’re his new favorite Christmas cookies. This is a must-try recipe!
Yay! We’re so happy to hear how much you both loved it! Thanks for sharing such positive feedback with us, Alexandra!
Did you use light or dark brown sugar in this recipe? Thank you! I can’t wait to make this!
Hi Lu, light brown sugar works great in these cookies! We hope you enjoy the recipe!
The batter was very wet .. definitely wouldn’t hold a balls shape before chilling .. any ideas what could have gone wrong? Going to try to chill in the bowl
Hi Nat, chilling the dough should help. Beyond that, you could try letting the browned butter cool a bit before creaming it with the sugar and/or adding a little extra flour/oats to the mixture to soak up the liquid. We hope these ideas help!
Love them but the first few trays were perfect and as we continued to cook them they spread and got really thin – did I do something wrong?
Hi Tamra, we’re so glad you loved them! It sounds like the dough got too warm. When baking in batches the dough that sits out for the later trays warms up and then the butter spreads faster when it’s their turn in the oven. You can always chill the dough a little more if it seems like it is getting warmer/softer. We hope this helps!
Accidentally used a tablespoon instead of teaspoon to measure baking soda and they still turned out amazing!
Oops! We’re glad they still turned out well for you, Sara! Thanks for sharing your positive experience with us. Happy baking!
Made mine sugar free. Delicious
We’re so glad you loved them, Gwyn! That’s good to know sugar-free worked for these cookies. Thanks for sharing!
Well unless you used starch free flour it can’t be sugar free ♂️
These are perfect. I can’t believe how easy they were to make. I didn’t have light brown sugar so I used a mixture of dark brown sugar and granulated sugar. I used 2.5 tablespoons of half and half because that’s what I had. This is another ME recipe that I will be making for a long time
Great cookie! Everyone loved them!!
Thank you for your positive feedback, Pamela! We’re so glad everyone loved the cookies. Happy baking!
Excellent nostalgic cookies!! Perfect for quick lunch snacks
We’re so glad you loved the recipe, Steff! Thank you for taking the time to share your positive experience with us!