Good mornings are guaranteed with a warm pan of these absolutely giant cinnamon rolls. This recipe uses almost the same dough as my classic overnight cinnamon rolls, but the rolls are extra large, extra fluffy—and extra delicious! They can be made ahead of time, too, so your morning will be as easy as it is sweet. Your kitchen will smell amazing while they bake, luring even the sleepiest of sleepyheads to the breakfast table. (And that’s a fact.)

You know those oversized cinnamon rolls from bakeries, Cinnabon, and coffee shops? They’re nearly the size of your plate and maybe a little too indulgent, but who doesn’t love an extra special breakfast? I originally published this recipe in 2016, and I’m bringing it back from the archives today with new photos. The recipe hasn’t changed at all, so if you’re in the mood for an extra large, extra soft, extra over-the-top cinnamon roll, read why readers have been loving these:
“I made these cinnamon rolls last week for my family and they were amazing, everyone loved them. It was one of my first times working with yeast and so I was a little nervous but luckily this recipe was so easy to follow! They were fluffy, sweet (but not too sweet) and so tasty!” – Veronica
“I LOVE making cinnamon rolls now because of this recipe. I’ve made many recipes in the past and have never been satisfied with the results. But Sally’s Giant Cinnamon Roll recipe has people begging me to make these (and the Raspberry Swirl Rolls) all the time now. Thank you for making me love homemade rolls more than a bakery or even Cinnabon!” – Chris
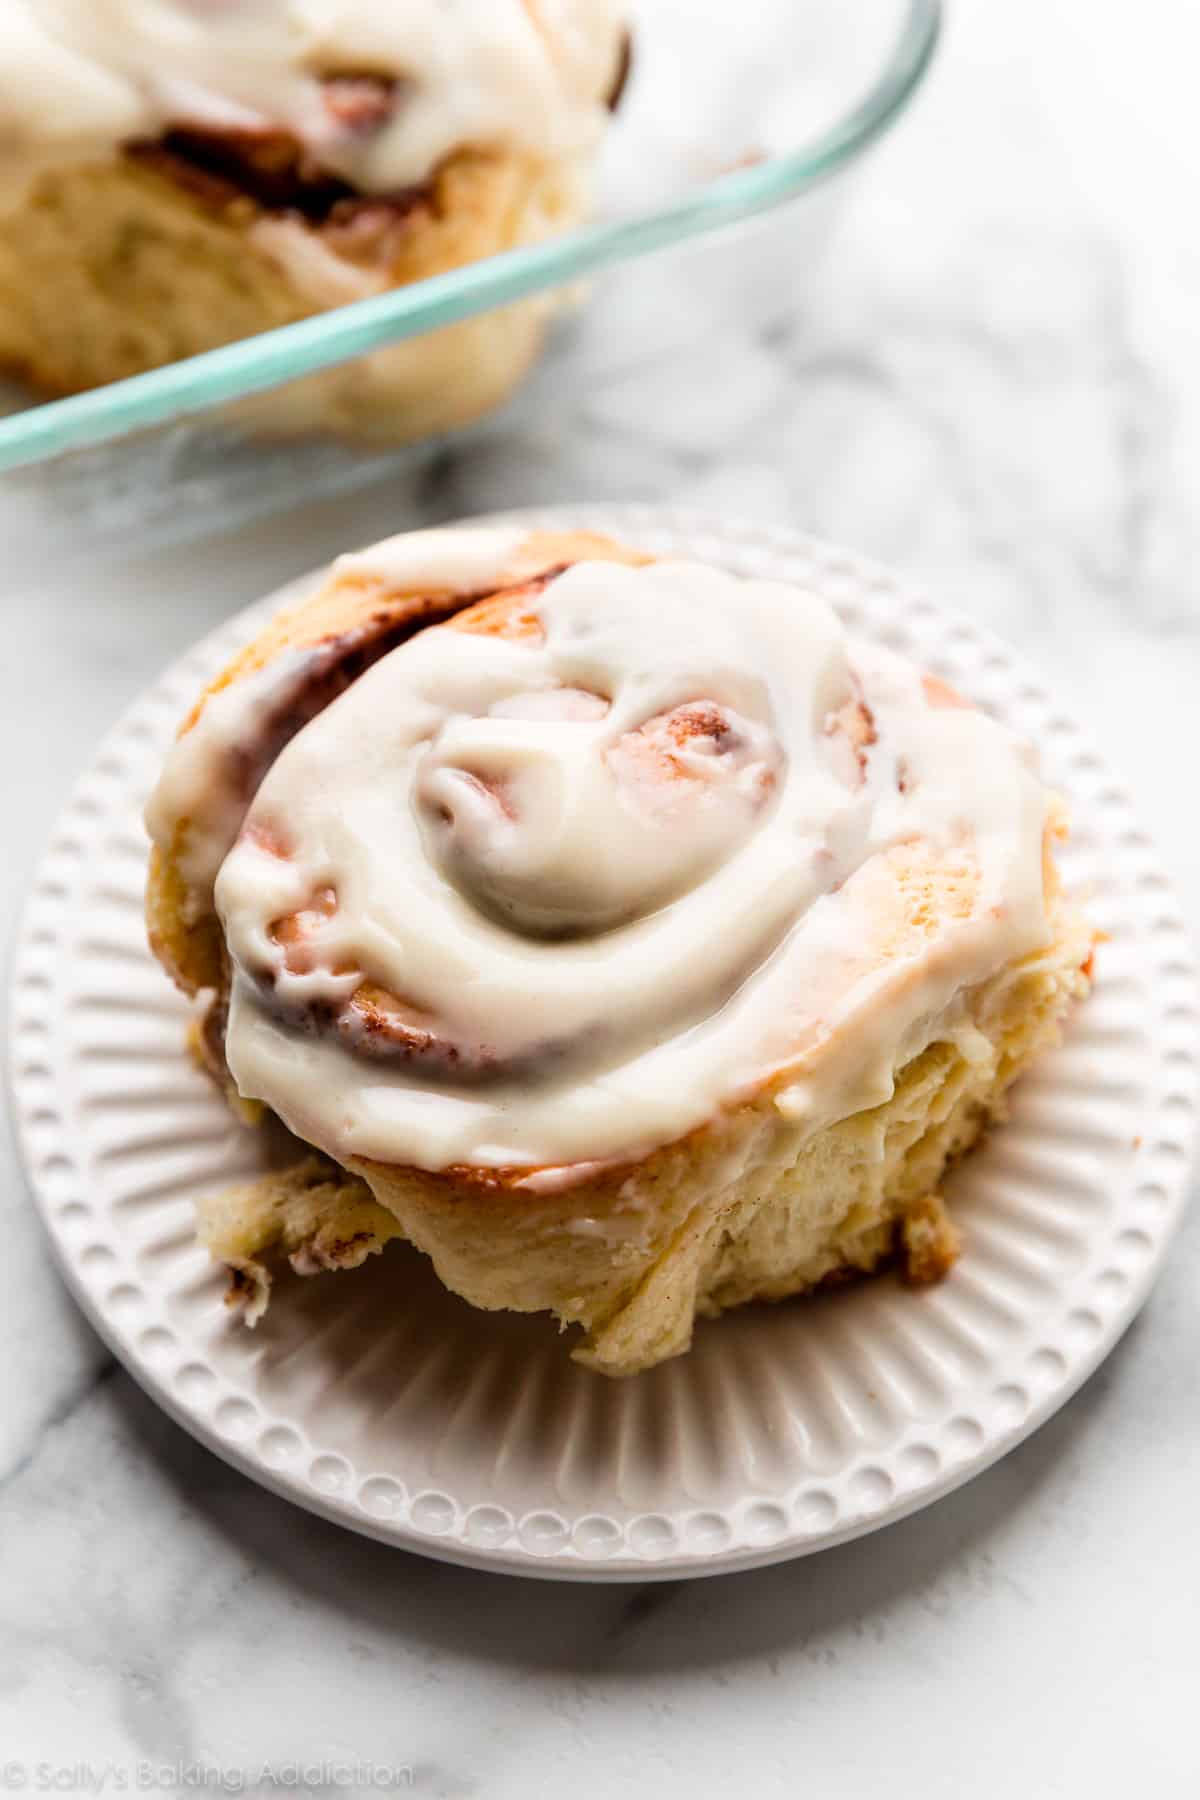
These Big Giant Cinnamon Rolls Are:
- Soft, tender, and buttery
- Packed with cinnamon-sugar-spiced scrumptiousness
- Generously slathered with cream cheese frosting
- A wonderful make-ahead recipe
- Perfect for weekend brunches or any morning occasion where you need something special
- Huge! Cinnabon size! About 3x bigger than my easy cinnamon rolls
Let’s Use My Favorite Soft Cinnamon Roll Dough
If you’ve made any of my cinnamon roll recipes before, this dough recipe will seem pretty familiar. I started with my standard sweet dough recipe that I use to make overnight cinnamon rolls, apple cinnamon rolls, and maple cinnamon rolls. It’s a rich dough, which uses butter fat to create a softer and more dessert-like bread dough. A few notable differences, though:
- Buttermilk: Buttermilk is a prime ingredient in many of my baking recipes including biscuits and vanilla cake, so I tried it in this dough. I usually use whole milk, but buttermilk makes the texture even richer and also gives the baked rolls a delicious (and very slight) tang. The buttermilk really takes these cinnamon rolls to the next level!
- Larger Rolls: I cut the rolls about 1.5x larger than I typically do. Usually this amount of dough makes 12 cinnamon rolls, but this time we’re making 8.
- Double the Yeast: We use more yeast in this recipe than in my easy cinnamon rolls. Why? Today’s big giant cinnamon rolls are much fluffier and larger—about 3x the size. After a couple hours rising, these rolls are massive and take up an entire plate. (Are you drooling yet?!)
Yeast Beginners: Use This Helpful Guide
Are you new to baking with yeast? If so, reference my Baking with Yeast Guide because I include practical answers to many common baker’s yeast questions. If you want something more, get on the fast track to baking bread like a pro with my free Beginner’s Guide to Yeast email series. 🙂
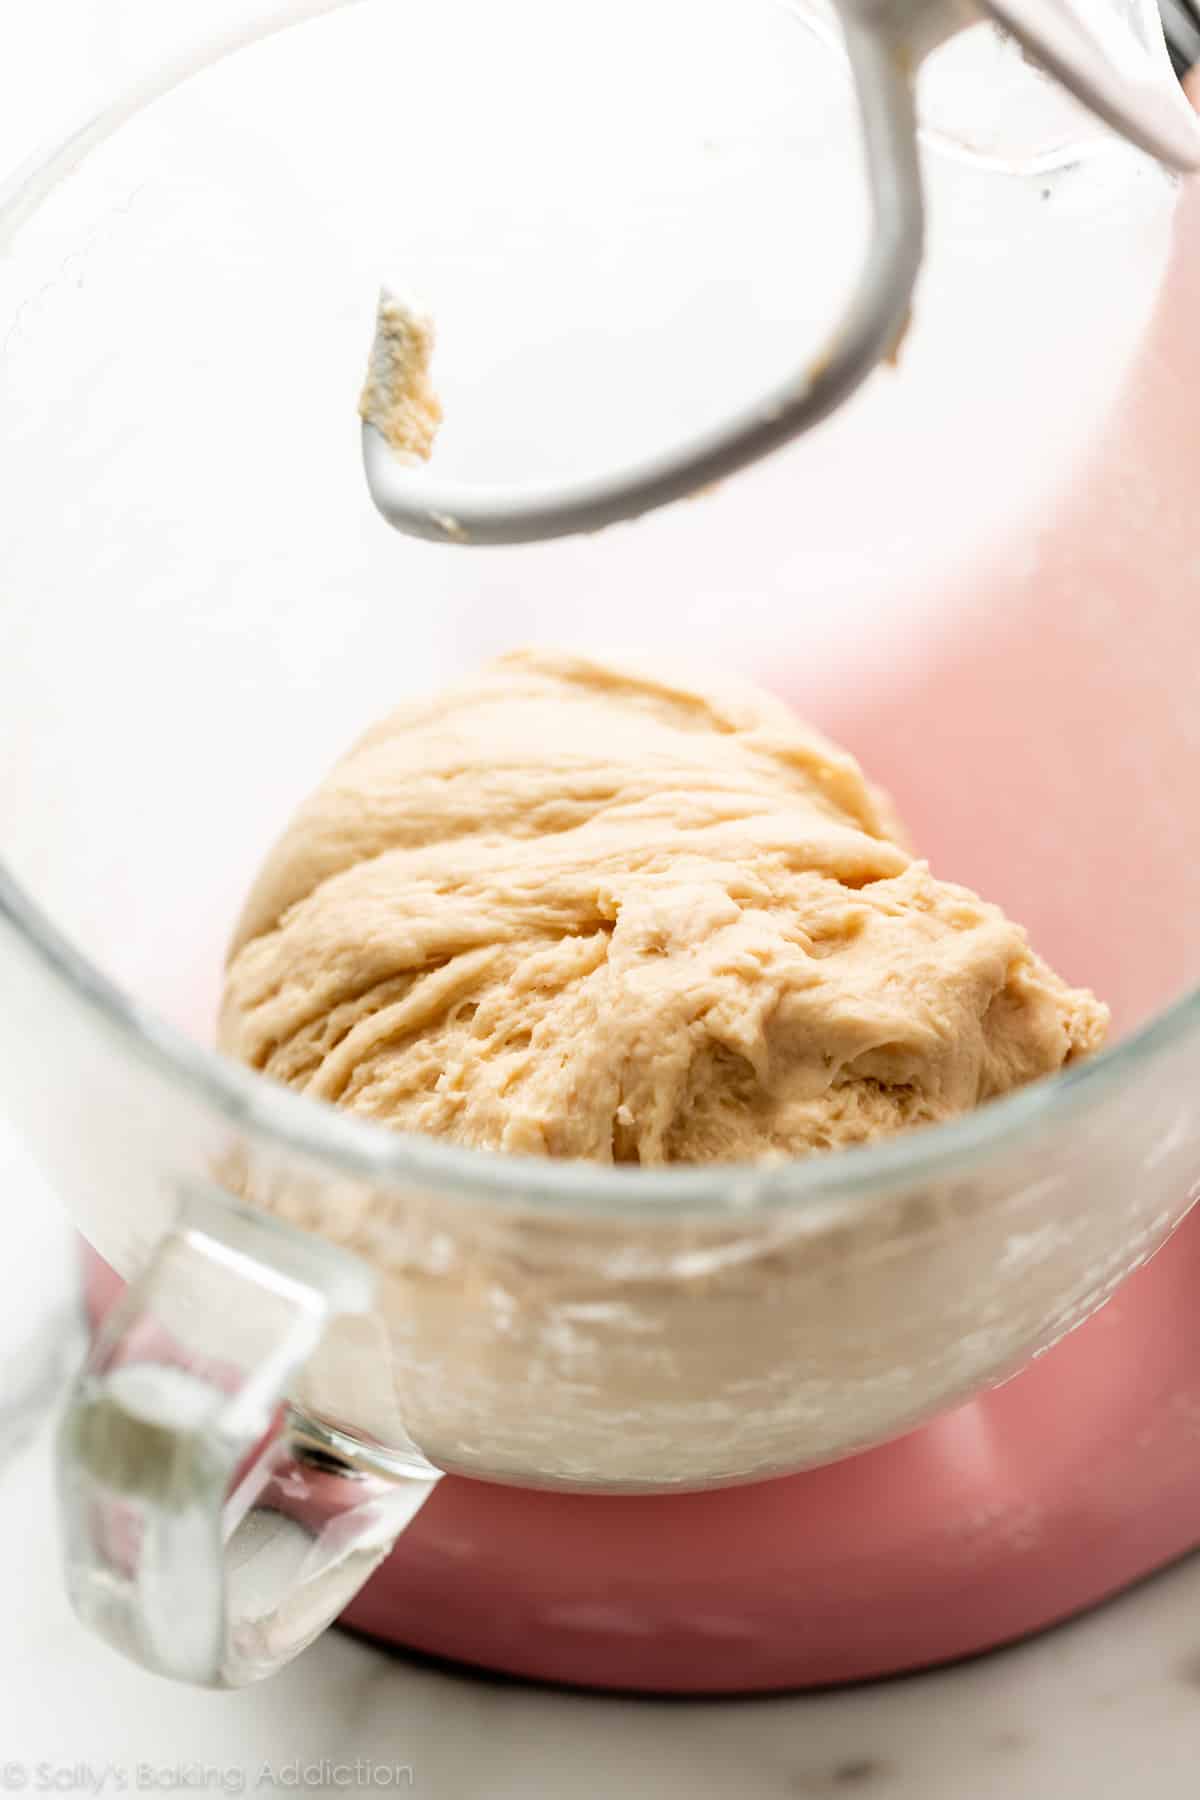
Step-by-Step Photos: How to Make Big Giant Cinnamon Rolls
Pictured above: Expect a soft and slightly sticky dough as you knead it. My How to Knead Dough video tutorial will help if you need a refresher.
Below left: This is the dough after the 1st rise. It really grows! Below right: Punch down the risen dough and get ready to roll it out and fill it.

Borrowing the following photo from overnight cinnamon rolls. Your big giant cinnamon rolls will look exactly the same as you roll up the dough with the cinnamon sugar filling inside, only you’re cutting the log into 8 cinnamon rolls instead of 12.


Now it’s time for the 2nd rise. After you cut all 8 rolls, place them in your greased quarter sheet pan and let them rise for about 2 hours. See how much they puff up?

FAQ About Big Giant Cinnamon Rolls
- Can I Use Nondairy Milk? Yes, many readers have successfully substituted nondairy milks in this dough. And in a pinch, you can use 2% or 1% milk, but do not use nonfat milk.
- What If I Don’t Have a Stand Mixer? I use a stand mixer for this dough, but if you do not own a stand mixer, you can mix the dough together with a large wooden spoon/rubber spatula. It will take a bit of arm muscle. A hand mixer works, but the sticky dough repeatedly gets stuck in the beaters. Mixing by hand with a wooden spoon or rubber spatula is a better choice.
- What’s the Best Pan to Use? You need a 9×13 inch (quarter sheet) pan for this recipe. I usually use a glass 9×13-inch baking pan because I find it heats the XXL rolls more evenly than a metal pan. If metal is all you have, that’s fine, just keep a close eye on the rolls towards the end of bake time.
- Can I Switch Frostings? I top these giant cinnamon rolls with buttery cream cheese icing. If you’d like to swap toppings, try the maple icing from my maple cinnamon rolls or the vanilla icing from my easy cinnamon rolls recipe.
- Can These Rise Overnight? Yes! There are detailed overnight instructions in the recipe below.

More Indulgent Breakfast Recipes
- Maple Bacon Doughnuts
- Monkey Bread
- Maple Pecan Sticky Buns
- Homemade Breakfast Pastries
- Dark Chocolate Raspberry Coffee Cake
- No Yeast Cinnamon Rolls
- Raspberry Sweet Rolls
Want something even… bigger? Here’s my giant cinnamon roll cake.
Print
Big Giant Cinnamon Rolls
- Prep Time: 4 hours (includes rises)
- Cook Time: 25 minutes
- Total Time: 4 hours, 40 minutes (or overnight)
- Yield: 8 large rolls
- Category: Breakfast
- Method: Baking
- Cuisine: American
Description
Good mornings are guaranteed with big giant cinnamon rolls. They’re almost double the size of your typical and covered with cream cheese frosting!
Ingredients
Dough
- 1 cup (240ml) buttermilk*, warmed to about 100°F (38°C)
- 2/3 cup (135g) granulated sugar, divided
- 1 and 1/2 tablespoons (14g) active dry yeast (2 standard size packets)
- 1/2 cup (8 Tbsp; 113g) unsalted butter, softened to room temperature and cut into 4 pieces
- 2 large eggs, at room temperature
- 1/2 teaspoon salt
- 4 and 1/2 cups (563g) all-purpose flour or bread flour (spooned & leveled), plus more as needed
- 2 teaspoons canola, vegetable, or olive oil for bowl (or use nonstick spray)
Filling
- 6 Tablespoons (85g) unsalted butter, softened to room temperature
- 1/2 cup (100g) granulated sugar
- 1 and 1/2 Tablespoons ground cinnamon
Cream Cheese Icing
- 4 ounces (113g) full-fat brick cream cheese, softened to room temperature
- 1 cup (120g) confectioners’ sugar
- 1 Tablespoon (15ml) heavy cream or milk
- 1/2 teaspoon pure vanilla extract
Instructions
- Prepare the dough: Whisk the warm buttermilk, 2 Tablespoons sugar, and the yeast together in the bowl of your stand mixer fitted with a dough hook or paddle attachment. Cover and allow mixture to sit for about 5 minutes or until foamy on top. *If you do not own a mixer, you can do this in a large mixing bowl and in the next step, mix the dough together with a large wooden spoon/silicone spatula. It will take a bit of arm muscle. A hand mixer works, but the sticky dough repeatedly gets stuck in the beaters. Mixing by hand with a wooden spoon or silicone spatula is a better choice.*
- On medium speed, beat in the remaining sugar (which should be 1/2 cup/100g) and the softened butter until it is slightly broken up. Add the eggs and salt and beat on medium speed until combined. The butter won’t really be mixing into the mixture, so don’t be alarmed if it stays in pieces. Switch the mixer down to low speed and with it running, add 1 cup of flour at a time, making sure it’s fully incorporated before adding the next. After 4 cups have been added, add the last 1/2 cup and beat until the dough comes together and pulls away from the sides of the bowl, about 3 minutes. Dough will be soft.
- Knead the dough: Keep the dough in the mixer and beat for an additional 5 full minutes, or knead by hand on a lightly floured surface for 5 full minutes. (If you’re new to bread-baking, my How to Knead Dough video tutorial can help here.) If the dough becomes too sticky during the kneading process, sprinkle 1 teaspoon of flour at a time on the dough or on the work surface/in the bowl to make a soft, slightly tacky dough. Do not add more flour than you need because you do not want a dry dough. After kneading, the dough should still feel a little soft. Poke it with your finger—if it slowly bounces back, your dough is ready to rise. You can also do a “windowpane test” to see if your dough has been kneaded long enough: tear off a small (roughly golfball-size) piece of dough and gently stretch it out until it’s thin enough for light to pass through it. Hold it up to a window or light. Does light pass through the stretched dough without the dough tearing first? If so, your dough has been kneaded long enough and is ready to rise. If not, keep kneading until it passes the windowpane test.
- 1st Rise: Lightly grease a large bowl with oil or use nonstick spray. Place the dough in the bowl, turning it to coat all sides in the oil. Cover the bowl with aluminum foil, plastic wrap, or a clean kitchen towel. Allow the dough to rise in a relatively warm environment for 2 hours or until double in size. (I always let it rise on the counter and it takes about 2 hours. For a tiny reduction in rise time, see my answer to Where Should Dough Rise? in my Baking with Yeast Guide.)
- Grease the bottom and sides of a metal or glass 9×13-inch baking dish or line with parchment paper.
- Roll out the dough: Punch down the dough to release the air. Turn the dough out onto a lightly floured work surface and, using a rolling pin, roll into a 10×16-inch rectangle. Make sure the dough is smooth and evenly thick. If the dough keeps shrinking as you roll it out, stop what you’re doing, cover it lightly, and let it rest for 10 minutes to relax the gluten. When you return to the dough, it should stretch out much easier.
- For the filling: Spread the softened butter all over the dough. In a small bowl, toss the cinnamon and sugar together until combined and then sprinkle evenly over the dough. Tightly roll up the dough to form a 16 inch long log. If some filling spills out, that’s ok just sprinkle it on top of the rolls. Cut into 8 large rolls (about 2 inches in width each). Arrange them in the prepared baking pan.
- 2nd Rise: Cover the rolls tightly and allow to rise until puffy, about 2 hours. (Or use the overnight option in the Notes below.)
- Preheat the oven to 375°F (191°C).
- Bake for about 25 minutes or until they are lightly browned on top. About halfway through baking time, tent a piece of aluminum foil over the pan to prevent the tops from browning too quickly. Remove pan from the oven and allow to cool on a wire rack for about 10 minutes as you make the icing.
- Make the icing: In a medium bowl using a handheld or stand mixer fitted with a paddle or whisk attachment, beat the cream cheese on medium speed until smooth and creamy. Add the confectioners’ sugar, cream/milk, and vanilla. Beat on low speed for 30 seconds, then switch to high speed and beat for 1 minute. Spread the icing over the warm rolls and serve immediately.
- Cover leftover frosted or unfrosted rolls tightly and store at room temperature for 2 days or refrigerator for 5 days.
Notes
- Make Ahead Instructions – Overnight: To prepare the night before serving, prepare the rolls through step 7. Cover the rolls tightly and refrigerate for 8–12 hours. The next morning, remove from the refrigerator and allow to rise on the counter for 1–2 hours before continuing with step 9.
- Make Ahead Instructions – Freezing: Baked rolls can be frozen up to 2–3 months. Thaw overnight in the refrigerator and warm up before enjoying. You can also freeze the unbaked rolls and here’s how: Bake the rolls in step 9 for only about 10 minutes at 375°F (191°C). Cool completely, then cover tightly and freeze. To serve, take the rolls out of the freezer and put into the refrigerator a few hours before serving. Then, finish baking them for 15–20 minutes right before serving.
- Special Tools (affiliate links): Stand Mixer | Rolling Pin | 9×13-Inch Glass Baking Pan or Metal Baking Pan | Glass Mixing Bowls
- Milk: Buttermilk adds delicious richness and tang to this dough. If needed, you can use whole milk instead. (I usually use one or the other.) You can use lower fat or nondairy milk in a pinch, but the rolls won’t taste nearly as moist or rich.
- Reference my Baking with Yeast Guide for answers to common yeast FAQs.









I make this recipe every Saturday to sell at our Deli for Sunday Brunch. I can’t seem to keep the bottom from getting too dark. I believe some is carmelization, but I would like it not quite as dark. I am following the directions exactly. Any suggestions? Thanks
Hi Patty! Perhaps you can try a different position in your oven – we usually use the middle to bottom third of the oven.
Been following you for years sweet girl. I always get asked for the recipe,no matter what I make. I always tell them to look for you on Pinterest or on your website. Keep up the good work and thank you for helping me to make my xl family happy
Thank you for sharing, Heidi! Happy baking.
Hi! I have been testing lots of cinnamon rolls recipes, but something always seems to be going wrong. With this one I just couldn’t get the dough to release from the sides of the mixer bowl. No matter how much extra flour I added the dough was still a very thick cake batter. What went wrong?
Hi Eva, we’re happy to help troubleshoot. There are a lot of factors that can go into the consistency of the dough, even down to the humidity and weather, so there’s nothing wrong with adding a bit more flour to help the dough come together. But if the dough was still the consistency of cake batter, were any of the other ingredients mis-measured or omitted by chance? The dough should be nice and soft.
I’m don’t consider myself a baker but I made these last night and they are honestly the best, most perfect cinnamon roll. So fluffy and soft.
Beautiful cinnamon rolls. I want to make certain the ingredients for the yeast is correct using 15g. Please advise.
Hi Kimberly, you need 1 and 1/2 tablespoons (14g) active dry yeast (2 standard size packets) for this recipe. Enjoy!
This recipe is fantastic and I’ve been making cinnamon buns for decades. I love how tender they are and aren’t dried out the next day 🙂 I used 1/2 cup water and 1/2 cup greek yogurt instead of buttermilk and it worked great. I’m tweeking it to be a little cheaper for a group to make in Mexico. 1 egg worked well and with a little less sugar. I use white sugar as the brown sugar in Mx doesn’t dissolve :/ Thanks again for sharing your fantastic recipe.
We’re so glad you enjoy this recipe, Karen!
Can it be made gluten free?
Hi Celine, we haven’t tested this recipe with gluten free flour, but let us know if you try it.
How would the steps change if I use rapid rise yeast?
Hi Christina, the steps are the same, no changes!