
Editor’s blog: The Dollhouse Makeover (Part 1)
Making over a dollhouse for my daughter and sharing my stories along the way!
Small Talk (Part One)
My grandfather was an engineer by trade but an amazing creative at heart. When I was little, he began building me the most amazing dollhouse. Unfortunately, he didn’t get to complete it before he died, and we didn’t hang on to the progress he had made (big regret!).
As I’ve gotten older, I’ve grown more sentimental, and I fondly remember that work-in-progress. I decided that if I ever had a little girl, I would redo a vintage dollhouse for her (since I’m not fond of woodworking; I prefer the decorating).
Fast-forward several decades. I was shopping at an antique mall in Dallas, wearing my sweet 3-month-old Genevieve, when I spotted the most fabulous dollhouse. The five-bedroom, one-bath, three-story home needed a lot of work: The roof was cracked, every room’s wallpaper was peeling and yellowed and the floors were chipped and stained. But it was only $35, and structurally, it was really well made.
I bought it, brought it home and let it sit in the corner of the playroom in our Dallas home. I had plans to do something with it for her first birthday and never got around to it. I had our son Grayson a month before she turned 2 so there was zero chance of it happening then. I thought 3 would be the year I’d get to it, but we moved from Dallas to San Diego shortly before her third birthday, and the dollhouse was stashed away (safely) in a POD somewhere. Somehow, I let her fourth birthday pass without even thinking of redoing it. But I decided that I would make over the dollhouse for Christmas from Santa this year.
So now I spend each and every night (after she’s sound asleep) redoing the dollhouse.
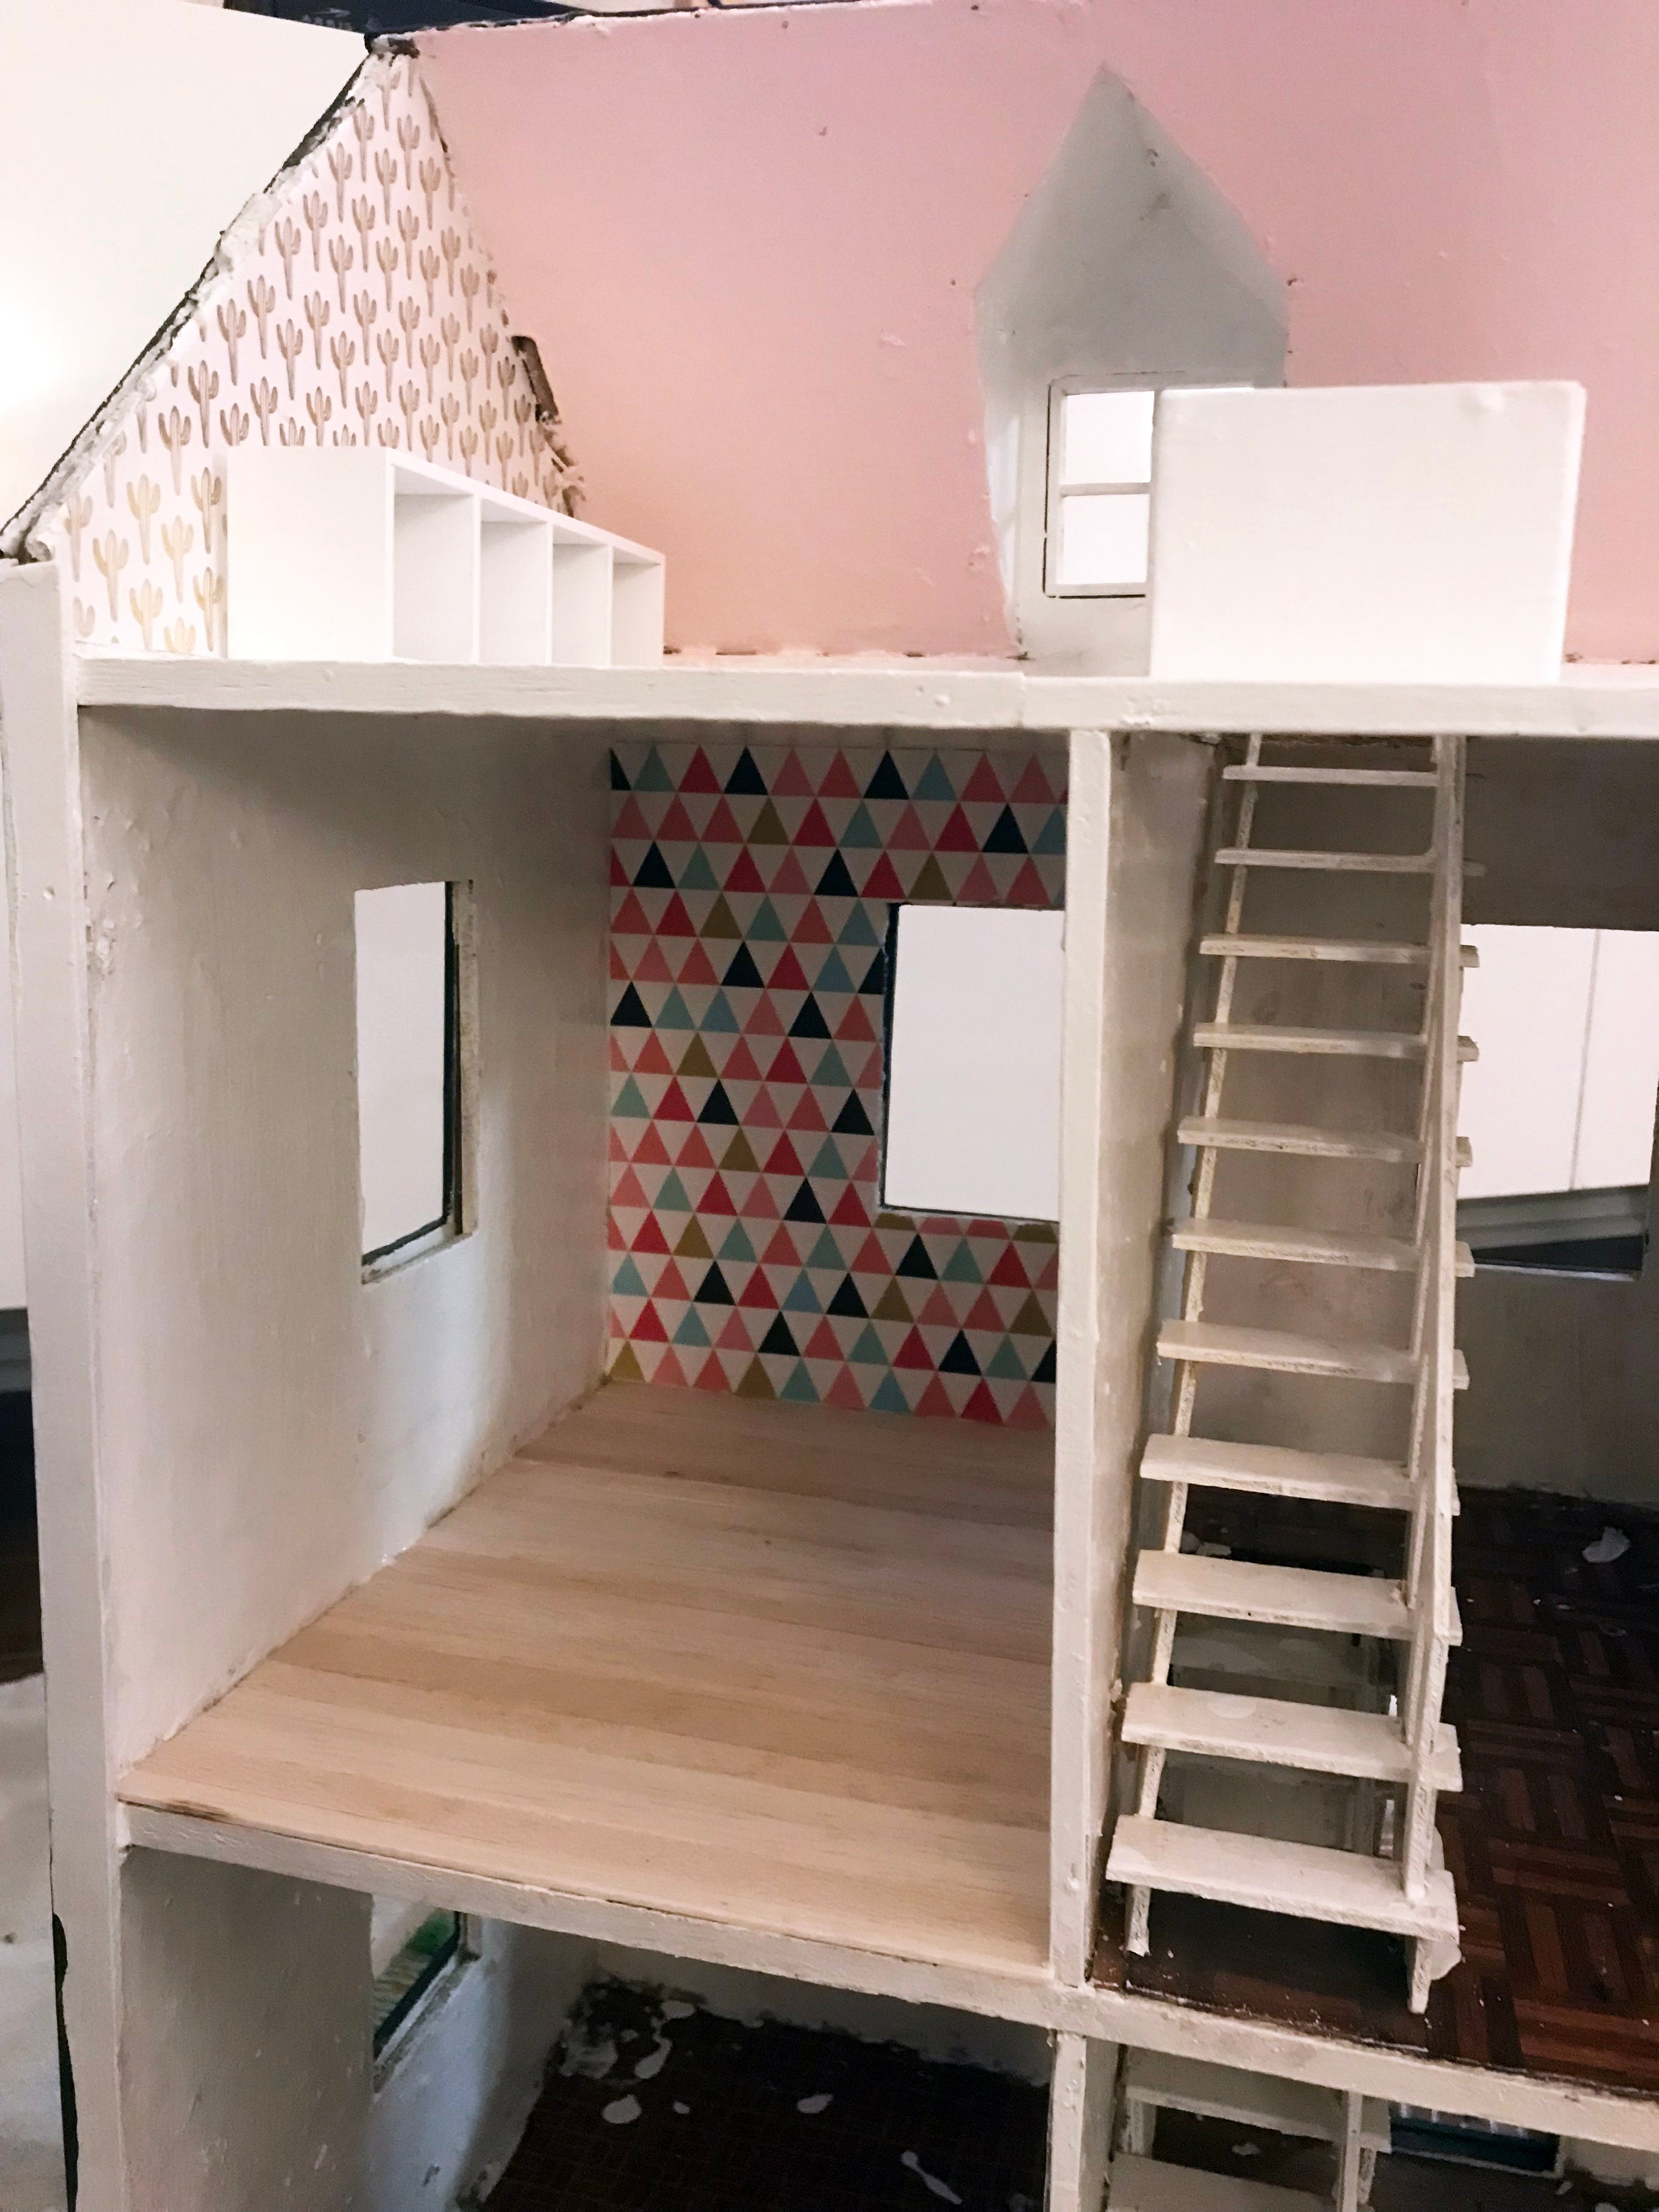
I started by getting rid of all the wallpaper, a task that took two nights. I saturated the paper with water, let it sit for a couple of minutes, then used a medium-size plastic putty knife (I was afraid metal might gouge the wood walls) to remove the wet paper. Only one room came off easily in large sheets. I had to scrape off some of the dated paper with my fingernails in most rooms. Next, I ripped up the carpeting and chipped away the remnants of the wasp’s nest, an addition I unintentionally moved from Dallas (oops). Then it was time to repair the roof. Initially, I thought I would add balsa wood to the missing section, then sand it to make it flush with the rest of the roof. Instead, I used my 12-inch flush-cut saw (one of the best purchases I have ever made) and cut the roof’s overhang back. I trimmed the sides as well so the overhang looks even.
I primed the exterior and all the interior walls and ceilings. Then came the fun part: starting to decorate. I kept the outside classic—black roof and window trim and white siding.

I decided I wanted a pop of pattern in every room, so I bought several different scrapbooking papers so I could play. I opted for a metallic gold cacti print in the nursery, a graphic geometric pattern for the guest room, a gray hexagon paper for the bathroom that resembles tile and black-and-white irregular dots for the walls in the master bedroom. Every other wall, except the wall/ceiling in the nursery, where I used pink, wear bright white paint. And I’m mixing up the floor coverings throughout. The nursery retains its white-painted wood, I installed rows of walnut-stained balsa wood in both bedrooms and painstakingly cut white faux white tile to wrap around the existing staircase in the hall bathroom.
That’s where I’m at right now. I complete one room each night then let it dry, set my alarm for 5 a.m., move the dollhouse to the living room next to our Christmas tree and hide it in plain sight under a blanket in the corner.
Next week, I’ll begin my furniture assembly from scratch. Wish me luck.


