Le projet du jour:  Another Sunday…another pointless purchase of parts I don’t need!

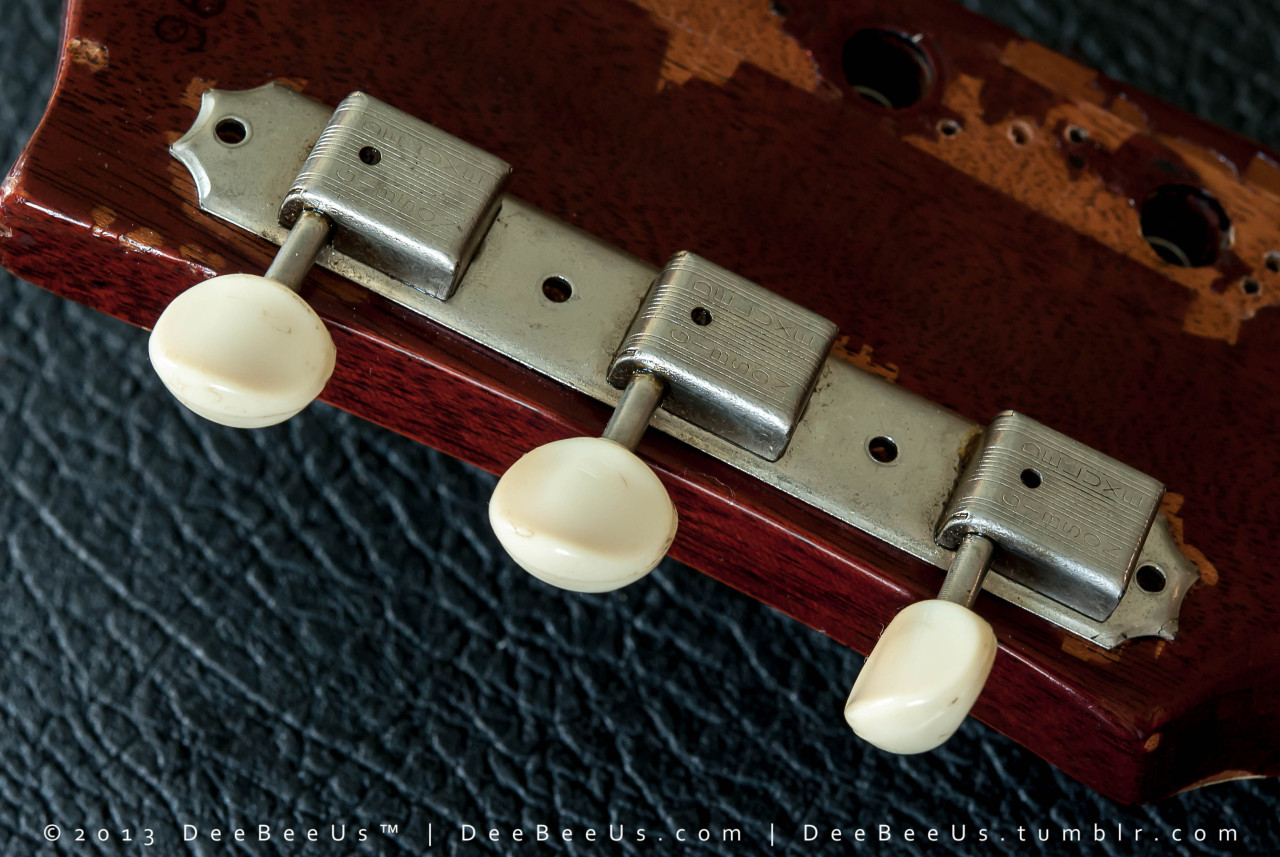
I was at my friend Peter’s guitar shop, Mojo Music of Oakville (about 20 km/12 miles West of Toronto, Canada), and I could not pass up these Allparts aged tuners.  They looked so great and the price was right too.  

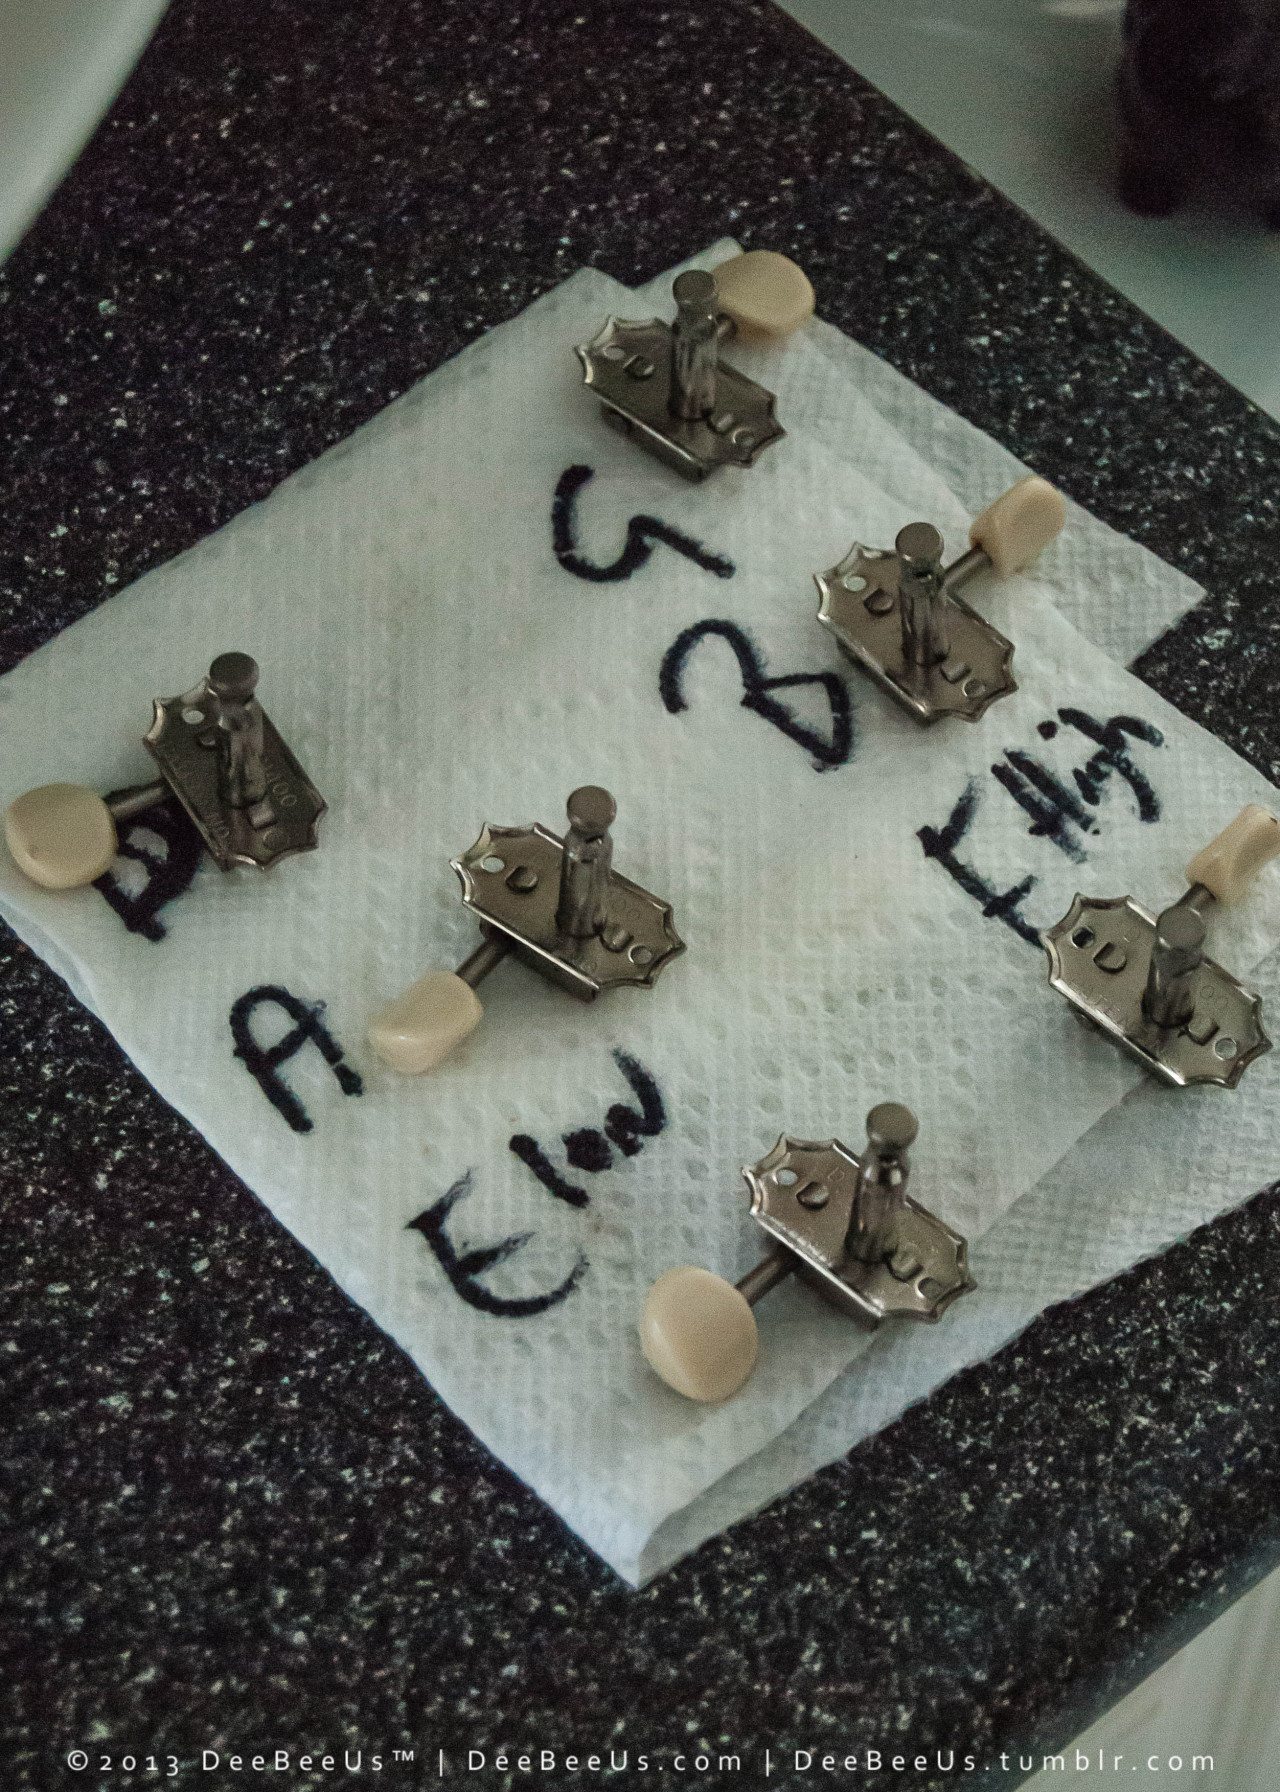
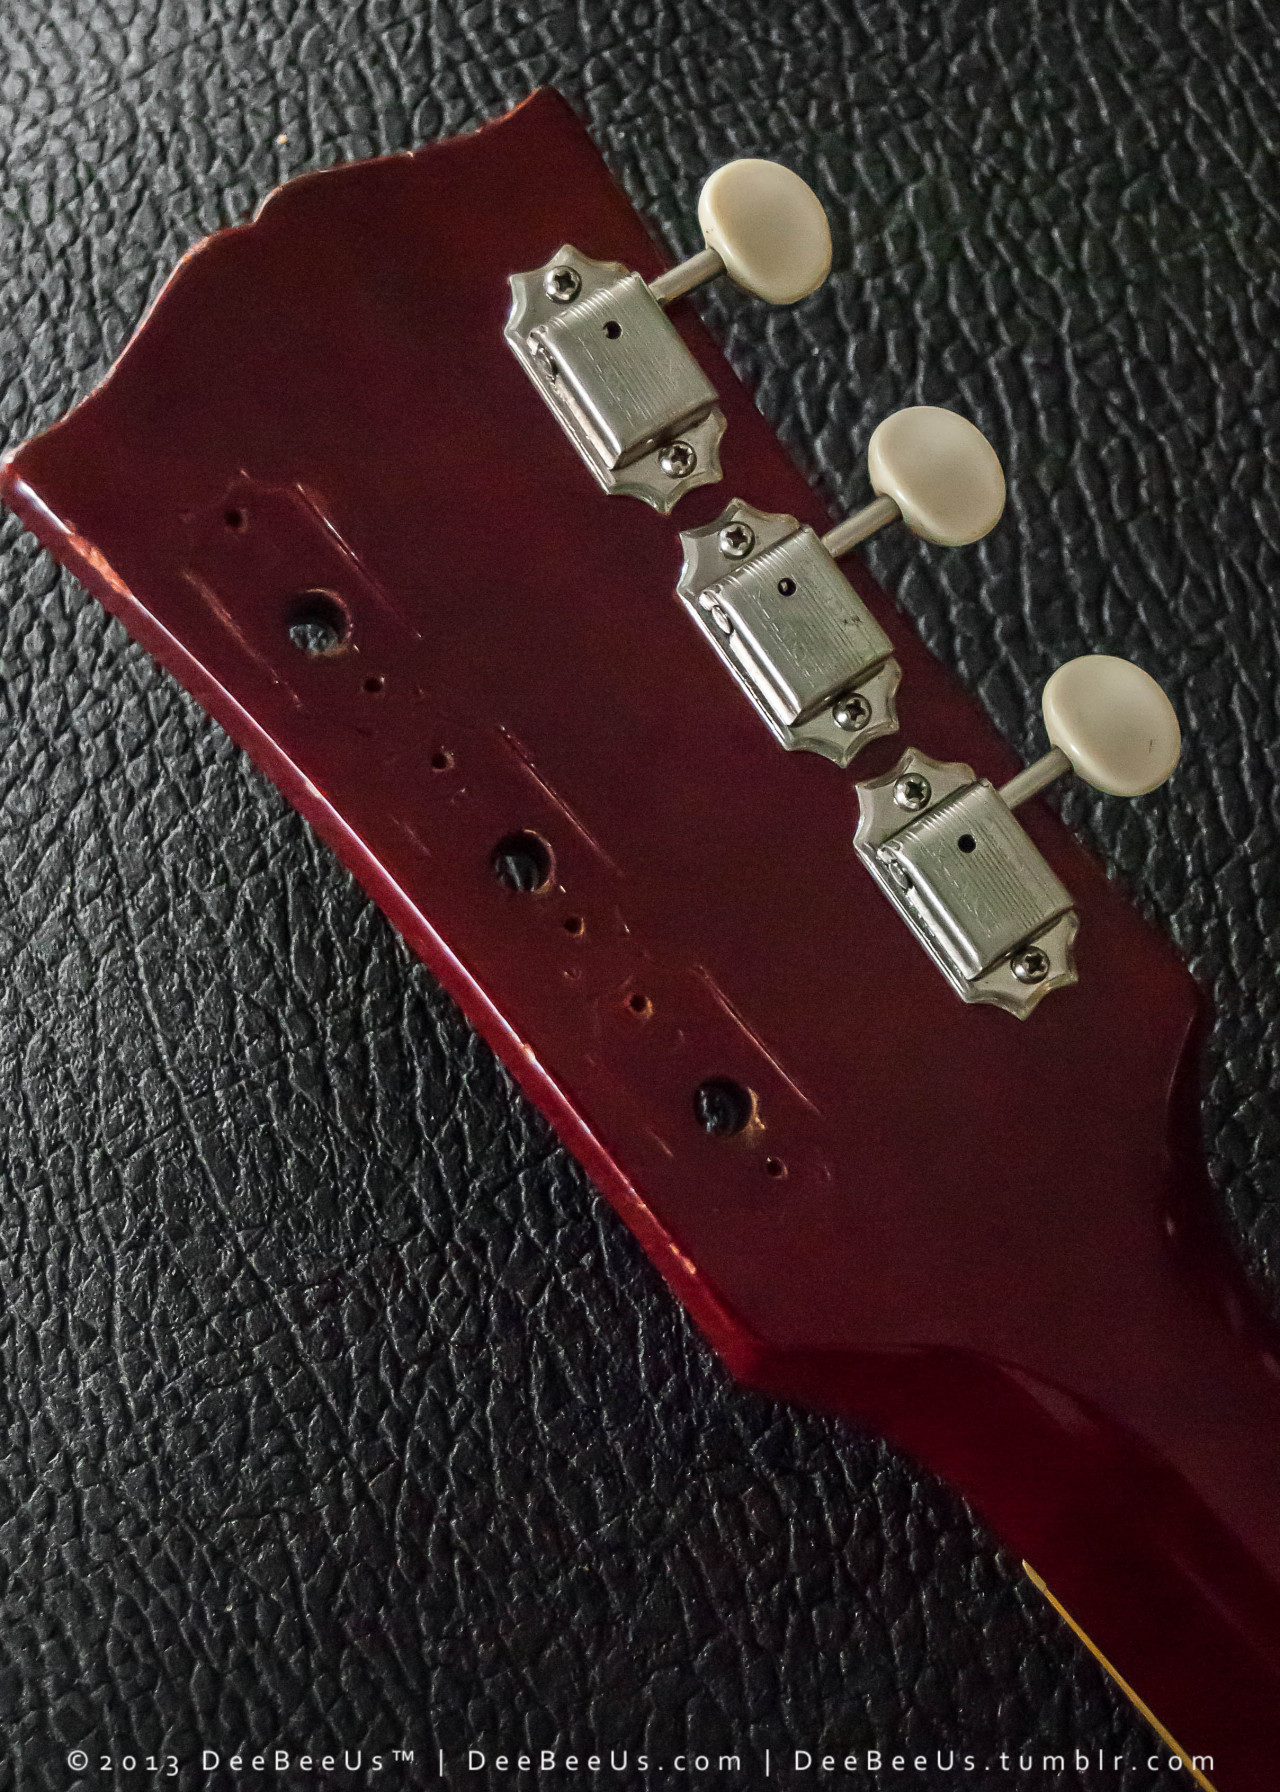
So they are going on my 2012 SG Standard P-90…for no particular reason.  I had already changed the tuners on this guitar once before…I removed the stock “tulip button” tuners and replaced them with ones that had white plastic buttons…in an attempt to morph it into something more like a 1960s SG Special.  But obviously an SG Special would have had “plate” tuners with white plastic buttons…not these individual white plastic button tuners.  But what the hell?  I must have been bored and poor that day as well!  Anyhoo: now that I have a proper replica of a white 60s SG Special, I don’t need to keep pretending this guitar is one!  :D

gibson sg sg standard p-90 cherry red guitar electric guitar my collection toronto mojo music oakville parts allparts tuners aged relic diy project maintenance guitar photography nikon d600

My first Stratocaster…1987 American Standard in Olympic White.

I love this guitar, but I was always a bit annoyed with one tiny aspect of the design - the new-style saddles.

When the new FMIC (Fender Musical Instruments Corporation) rose from the ashes of CBS ownership and began production again, they did a great job of designing the new American Standard model.   They returned to the pre-CBS small headstock, 4 bolt neck, and regular truss rod (as opposed to the “bullet” truss rod of the 70s and early 80s).  They also changed the traditional 6 screw tremolo bridge plate to a 2 point design - which was actually a good idea, because the 4 screws in the in center aren’t actually needed anyway!  

But to my chagrin, they also went with a new style of string saddle.  My guess is that this design was supposed to be easier on strings - i.e. less breakage, but that is just my guess.  So what is my problem with these?  It has nothing to do with their functionality…I simply don’t like the way they look! 

So I have always had it in the back of my mind to change the saddles to the traditional pressed steel type if I ever got the chance to.  A couple of years ago I found a set of replacement saddles…but discovered to my dismay that the new-style saddles are mounted with a off-center screw so trying to replace the saddles alone was not going to work. I had to find saddles AND a new bridge plate.   This sounds pretty simple right?  Wrong.  Sure there are TONS of replacement bridge plates out there in the pre-1987 “six screw” mounting design, but it’s next to impossible to find a modern (2007 and later) American Standard bridge plate that has the 2 point mount AND the centered saddle screws!

But yesterday I FINALLY found one.  And today I am putting it on!  Two decades of saddle-related unhappiness will come to an end in the course of an afternoon!

fender stratocaster american standard tremolo saddles strings fmic cbs design guitar electric guitar olympic white vinatge 1987 my collection toronto diy maintenance guitar parts guitar photography nikon d600

Do you ever get that sinking feeling when you take something apart and then are not quite sure if you can put it back together again?

Context:  I dislike it when the trem arm on a Stratocaster hangs all loose and whatnot.  I want it either out of the way or fixed in position so I can grab it easily.  This is not always easy to do…if you over-tighten it, it doesn’t move easily.  If you under-tighten it, it hangs down all loose and whatnot!

Fender sells small springs that can be dropped into the hole which then exert enough upward pressure to hold the arm in place…not too tight, and not too loose…but just right.  Kind of like the old parable of Goldie Hawn and the Three Bears.

I dropped one of the aforementioned springs into my seafoam Nash S-63, and to my utter chagrin, I was not able to get the arm deep enough for it to catch the threads and be screwed in.  THEN I tried to remove the spring, but it was jammed down there.  :\

So…I took the damn thing apart to try and fish the spring out!  Round about photo #4 I started getting nervous about putting it back together again!

Long story short, I was able to get the spring out, and put the trem assembly back together with only 4 or 5 pieces leftover!  Success!

PS:  it wasn’t the spring causing the arm not to grip…it was the worn/stripped threads on the arm itself.  I tried a different replacement trem arm (I have about 10 of them lying around the house!) and it gripped perfectly and stayed in place!

fender stratocaster nash s-63 guitar electric guitar seafoam my collection toronto maintenance diy project tremolo spring stuck stripped threads parts guitar repair guitar photography nikon d600

Friends!  Have you ever wanted to improve the neck angle on your post-1970 Stratocaster?  But, for whatever reason, you’re not comfortable “shimming” a neck?  Maybe your neck already has minimal relief, your saddles are adjusted down to the bridge plate, and yet the action is still too high for your taste?

Enter the ingenious “Micro-Tilt” neck.  This feature was added to the Stratocaster model at the same time that the much maligned 3 bolt neck was added, and though it was a great innovation for adjusting the angle of a bolt-on neck (and, I believe, it was also the very last thing Leo Fender invented before leaving the Fender Company for good!) it kind of got lost in the negative buzz around the 3 bolt neck.

Here is my recently acquired 1988 American Standard.  I did all of the above:  straightened the neck, lowered the saddles as much as I could, and still the action was too high for my liking.  I was about to shim, when I remembered the Micro-Tilt, and decided to use it for the first time ever (which is pretty incredible if you consider that I have owned around 20 Stratocasters - many of them with the Micro-Tilt feature - over the years).  

  • Photo 2 shows the neck plate.  The hole in the middle (between the two back neck bolts) is the access hole for the Micro-Tilt.
  • Photo 3 shows a 1/8th inch hex wrench that I have inserted into the hole.  In less than one full clockwise revolution of the Micro-Tilt, I was able to increase the neck angle and lower the action significantly.

I didn’t even have to take the neck off…just loosen the two back bolts…and it was all done in about 2 minutes.  So easy.  Thanks for another great invention, Leo! 

fender american standard stratocaster 1988 birthday present micro-tilt neck neck angle adjustment guitar electric guitar my collection toronto shim diy maintenance setup guitar photography nikon d600 leo fender

Well, apparently it’s snowing again.  WTF nature?!?

Also, I decided to shim the neck on my 1968 Telecaster.  The action was high, not crazy-high, but I like it a little lower and since the saddles were about as low as they could go, and the neck relief was acceptable, I figured I would add a bit of “angle” to the neck.  It worked well…but I may add a slightly thicker shim to bring it down a tiny bit more…

Also: when shim-ing, it’s fun to use personalized shims!  :D

fender telecaster vintage guitar electric guitar my collection 1968 blonde 68 shim neck macro original photography nikon d600 repair maintenance diy

1966 Jaguar on my workbench.   Correcting the intonation of the low E string is my top priority task of the day.  It gets gradually more and more out of tune as you get closer to the 12th fret.

General comments about intonation:

  • I wish I could remember the rules of intonation.  Like, if the note (at 12th fret) is sharp relative to the harmonic…do I lengthen the string (i.e. draw the saddle back?)  Or is it the other way around?
  • Someone who shall remain nameless but is a pro guitar tech told me once that if you use the 19th fret in stead of the 12th, you get better intonation.  Is this true?

fender jaguar vintage guitar electric guitar my collection toronto intonation maintenance diy sunburst 1966 original photography photographers on tumblr nikon d600 lightroom winter snow cold trees

After MUCH* polishing with Meguiar’s #2 and #9, the haze is slowly but surely being removed form the finish on this ‘68 SG Special.

* an astonishing amount of buffing has been required to make even the slightest of improvements in the clarity of the finish.  LUCKILY, I just got some coarse compound through Stew Mac, so hopefully it will better cut through the haze the next time I decide to spend 3 or 4 hours buffing this guitar!  ;)

gibson sg sg special guitar electric guitar my collection toronto macro maintenance refinish diy original photography photographers on tumblr nikon lightroom

More from my recent activities to restore my 1968 SG Special.  I actually put some reproduction pickup covers on it becuase the originals were damaged in a strange (and ugly!) way!  I applied some “light relic” techniques to the replacements…

In the last photo you can see the holes left over from the retrofitted stop tail piece (that I have removed!).  These will eventually be plugged, but for now they are concealed under a “Custom Made” plate…like you would find on an ES-335 with a bigsby.

gibson sg sg special restoration maintenance diy guitar electric guitar my collection toronto fix repair restore photography nikon d3000

The SG Special Project #6:

They say understatement and subtlety is key to good relic-ing.  And if that’s true than I have failed miserably!

When I bought my 1968 SG Special, the original knobs, like the original tuners had been replaced in the 70s.   I bought a set of period-correct reissue “witch hat” knobs, but they looked so foolish on a heavily weathered and worn guitar because they were so new and shiny!

Using some 320 grit sandpaper and some fine steel wool, I tried to take the “shine” off one of the knobs…with the results you see here.  :(   Yes…I went too far and now it looks ridiculously overdone!    Lucky I have another set of knobs to play with…  :D

gibson sg sg special vintage 1968 restoration diy maintenance project guitar electric guitar my collection toronto witch hat knobs relic aging failure sad oh well try again! photographers on tumblr nikon d200 macro

Operation SG”, part 3.

I’m trying returning my 1968 Gibson SG Special to as “original” a state as I can using original vintage and reissue parts where required.

Here, I am installing a set of 1960s vintage Kluson plate tuners.  The previous owner had installed Grover tuners (see the extra holes in the headstock?) in the 70s…a pretty common mod people made to Gibsons in the 60s and 70s.   These Kluson-style replacements are not original to the guitar, but they are (roughly) of the same vintage, and they have a nice tarnished patina…as opposed to the reissues which are so clean the will blind you if light reflects off them at the correct angle (see photo 1 vs. photo 7)!  I have just cleaned and re-lubed, and they aren’t “tight” when you turn the buttons, so I am hoping that they will do a decent job of staying in tune!  I am a little worried though, because there seems to be a fair amount of “backlash” (that thing when you turn and turn and turn and nothing happens and the “PING”…the string jumps a semitone!) in them when they are under tension…

I’ll be sure to let you know how it turns out!

PS:  See how the original finish is flaking off around the tuners, which have been removed, replaced and removed again several times?  Do any of you guitar-repair-tech-maintenance-DIY-nerd-people-types have any tips on how to contain this process of chipping?  And if you’re just gonna say “don’t take the tuners off so f*cking much you dipsh*t!”, I am WAY ahead of you!

?

gibson sg sg special 1968 60s 1960s vintage guitar electric guitar my collection toronto kalamazoo mi michigan diy maintenance project restore restoration photography nikon d200 d3000 macro

 "Operation SG“ Part 2.  

Here we see me extracting the bushings added to accommodate the stop bar tailpiece someone long ago decided was better than the stock setup.

I paid a small fortune for this knob/bushing extractor tool from Stew-Mac, but it paid for itself with this one task!  I was still hard to pull them out…but I couldn’t imagine what I would have done without it.  It simply wouldn’t have been possible to extract them cleanly.

PS: I will be plugging those holes with mahogany dowels - but that’s another installment…  

gibson sg sg special 1968 60s vintage restoration tune-o-matic tailpiece guitar electric guitar my collection toronto diy maintenance photographers on tumblr nikon d200

The project of the day was to re-mount the original Kluson white button tuners on my 1966 ES-330.  

Earlier this year I had been experiencing stickiness and backlash in the stock tuners, so had replaced them with modern reissues (from Allparts or TonePros…can’t remember which).  

I was content to keep the reissue tuners on the guitar becuase they made it a lot more tunable…and therefore more fun to play, but I read an article from Stew Mac talking about how to clean and relube old tuners to bring them “back to life”.    After much naphtha injection and 3-In-1 oiling, they were working a lot better.  Not perfect, but tolerable!  Here are a few shots of the process:

  1. Whenever I take the strings off a guitar with a trapeze tailpiece, I slide a cloth under the tailpiece to ensure it does not come in contact with and possibly damage the top of the guitar when the string tension is released.
  2. The “before” shot, with the modern reproduction tuners.
  3. The original tuners all clean and lubed, and laid out on my high tech method of remembering which tuner goes with which string!
  4. The bass side reissue tuners are off.
  5. Here we see the replacement tuners (on the left side of the headstock) and the originals (on the right) mounted side by side.  Note the subtle yellowing of the plastic buttons and the relatively dull-looking metal casings on the right, vs. the shiny metal and very white buttons of the reissues on the left.
  6. The original bass side tuners are installed and the treble string reissue tuners have been removed.  I used an old fashioned phillips screwdriver only for mounting and removing these for fear that an electric screwdriver, although faster and easier to use, could possibly damage the finish if wound too tightly, or strip the wood inside the mounting holes resulting in screws that could not be fully tightened.
  7. The “after” shot with new strings installed.
  8. Vintage tuners (mounted on the headstock) and the reissues (that have just been removed)  lying beside them on the yoga mat that I use for a workbench!  :D
  9. Did I mention the back of this 330 is gorgeous?
  10. Finished…the old tuners ready to go.  Still a bit difficult to turn vs. the reissues, but they work better than before and just look “right”.  The reissues were too clean!

gibson this is is-330 1966 vintage cherry tuners reissue allparts tone pro reproduction guitar electric guitar my collection toronto project diy maintenance restore photography nikon d200


Indy Theme by Safe As Milk